
Lino Printing Tips - What tools do you use for Lino Printing?
When starting out on your Lino Printing journey it can be a bit confusing deciding on which tools and materials to use and more importantly how to use them. There are so many to choose from it can be bit of an headache. So here's my guide on the type of tools you can get and how to use them safely.
Carry on reading to find out how to prepare your lino ready for cutting and I’ll also show you what each tool does and the type of cut marks they make.
At the end there is an accompanying video showing you how to use the tools with more tips.
Which Cutting Tools to Choose?
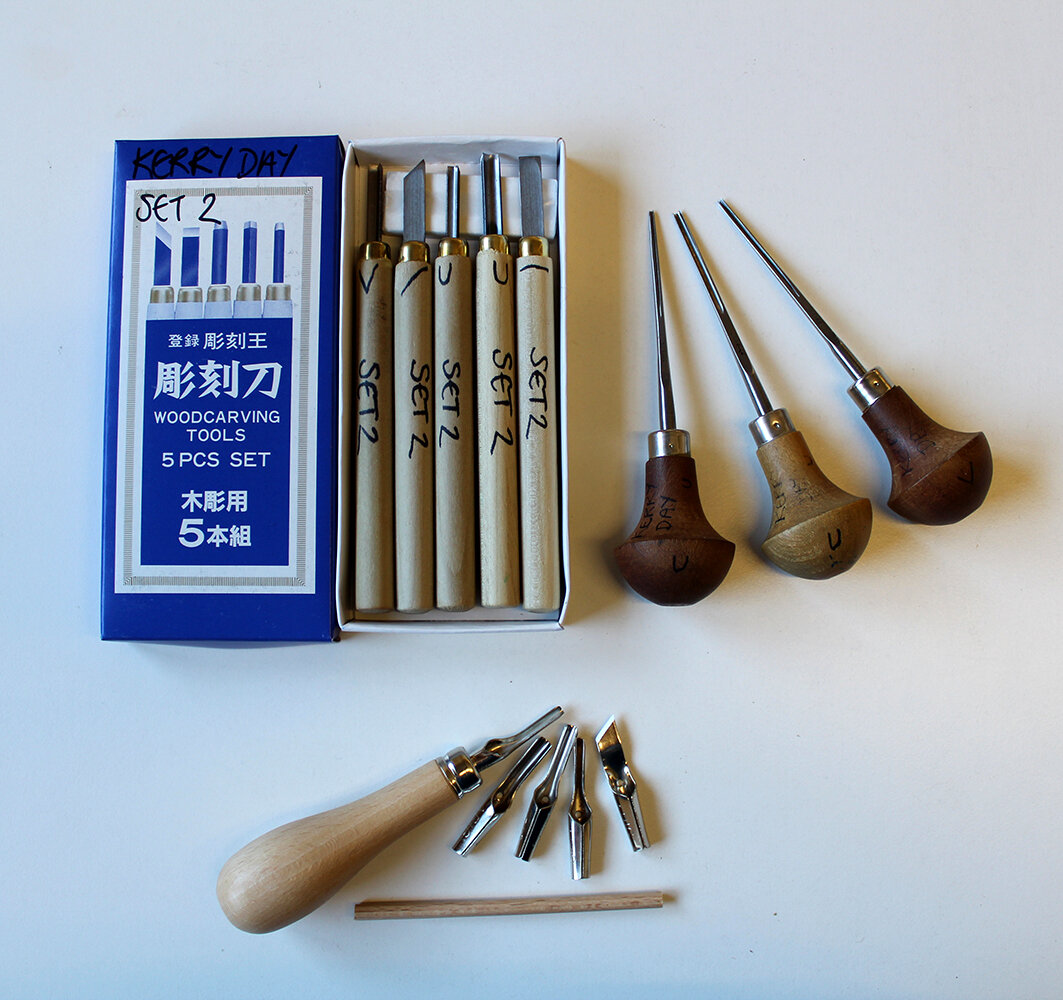
Tools tend to come in three types; Mushroom Shaped (often referred to as Pfeil or Swiss tools), Pencil Shaped and Detachable Blades.
The Pencil shaped ones (pictured and used throughout the examples below and in video) are a good set for beginners with the basic V, Knife, U and Chisel tools.
Once you get the hang of carving you may want to invest in better quality Swiss/Pfeil or Japanese Tools (Pencil Shaped) as they come in a greater variety of gouge sizes and are generally a better quality of metal which makes them more durable, and can be more comfortable to hold whilst carving.
The Detachable Blades sets are often included in Lino Printing kits for beginners and though they have a good variety of gouge sizes they tend to be made of cheaper metals that blunt very easily, plus having to keep changing the blades for different gouges can become tiresome and a little bit dangerous on your fingers. For this reason I will never recommend these to my students.
Which Lino to Use?
In the following examples I have used Traditional Lino. This usually comes in two types; grey and red. The grey tends to be softer and easier to cut. The red is firmer, which can achieve finer lines and details. Both are a natural product, made up of cork, linseed oil and sometimes wood dust compacted down onto a hessian backing.
There are alternatives to Lino such as Soft Cut, Easy Carve and Japanese Vinyl. These are all a type of plastic and technically not Lino. However a lot of people say they find them easier to cut than traditional Lino, however providing you keep your tools sharp you really shouldn’t have any problems at all. And you may want to consider the environmental impact of using a plastic product. Traditional Lino is a natural product and will eventually break down and decompose whereas the plastic alternatives will not.
Preparing Your Lino
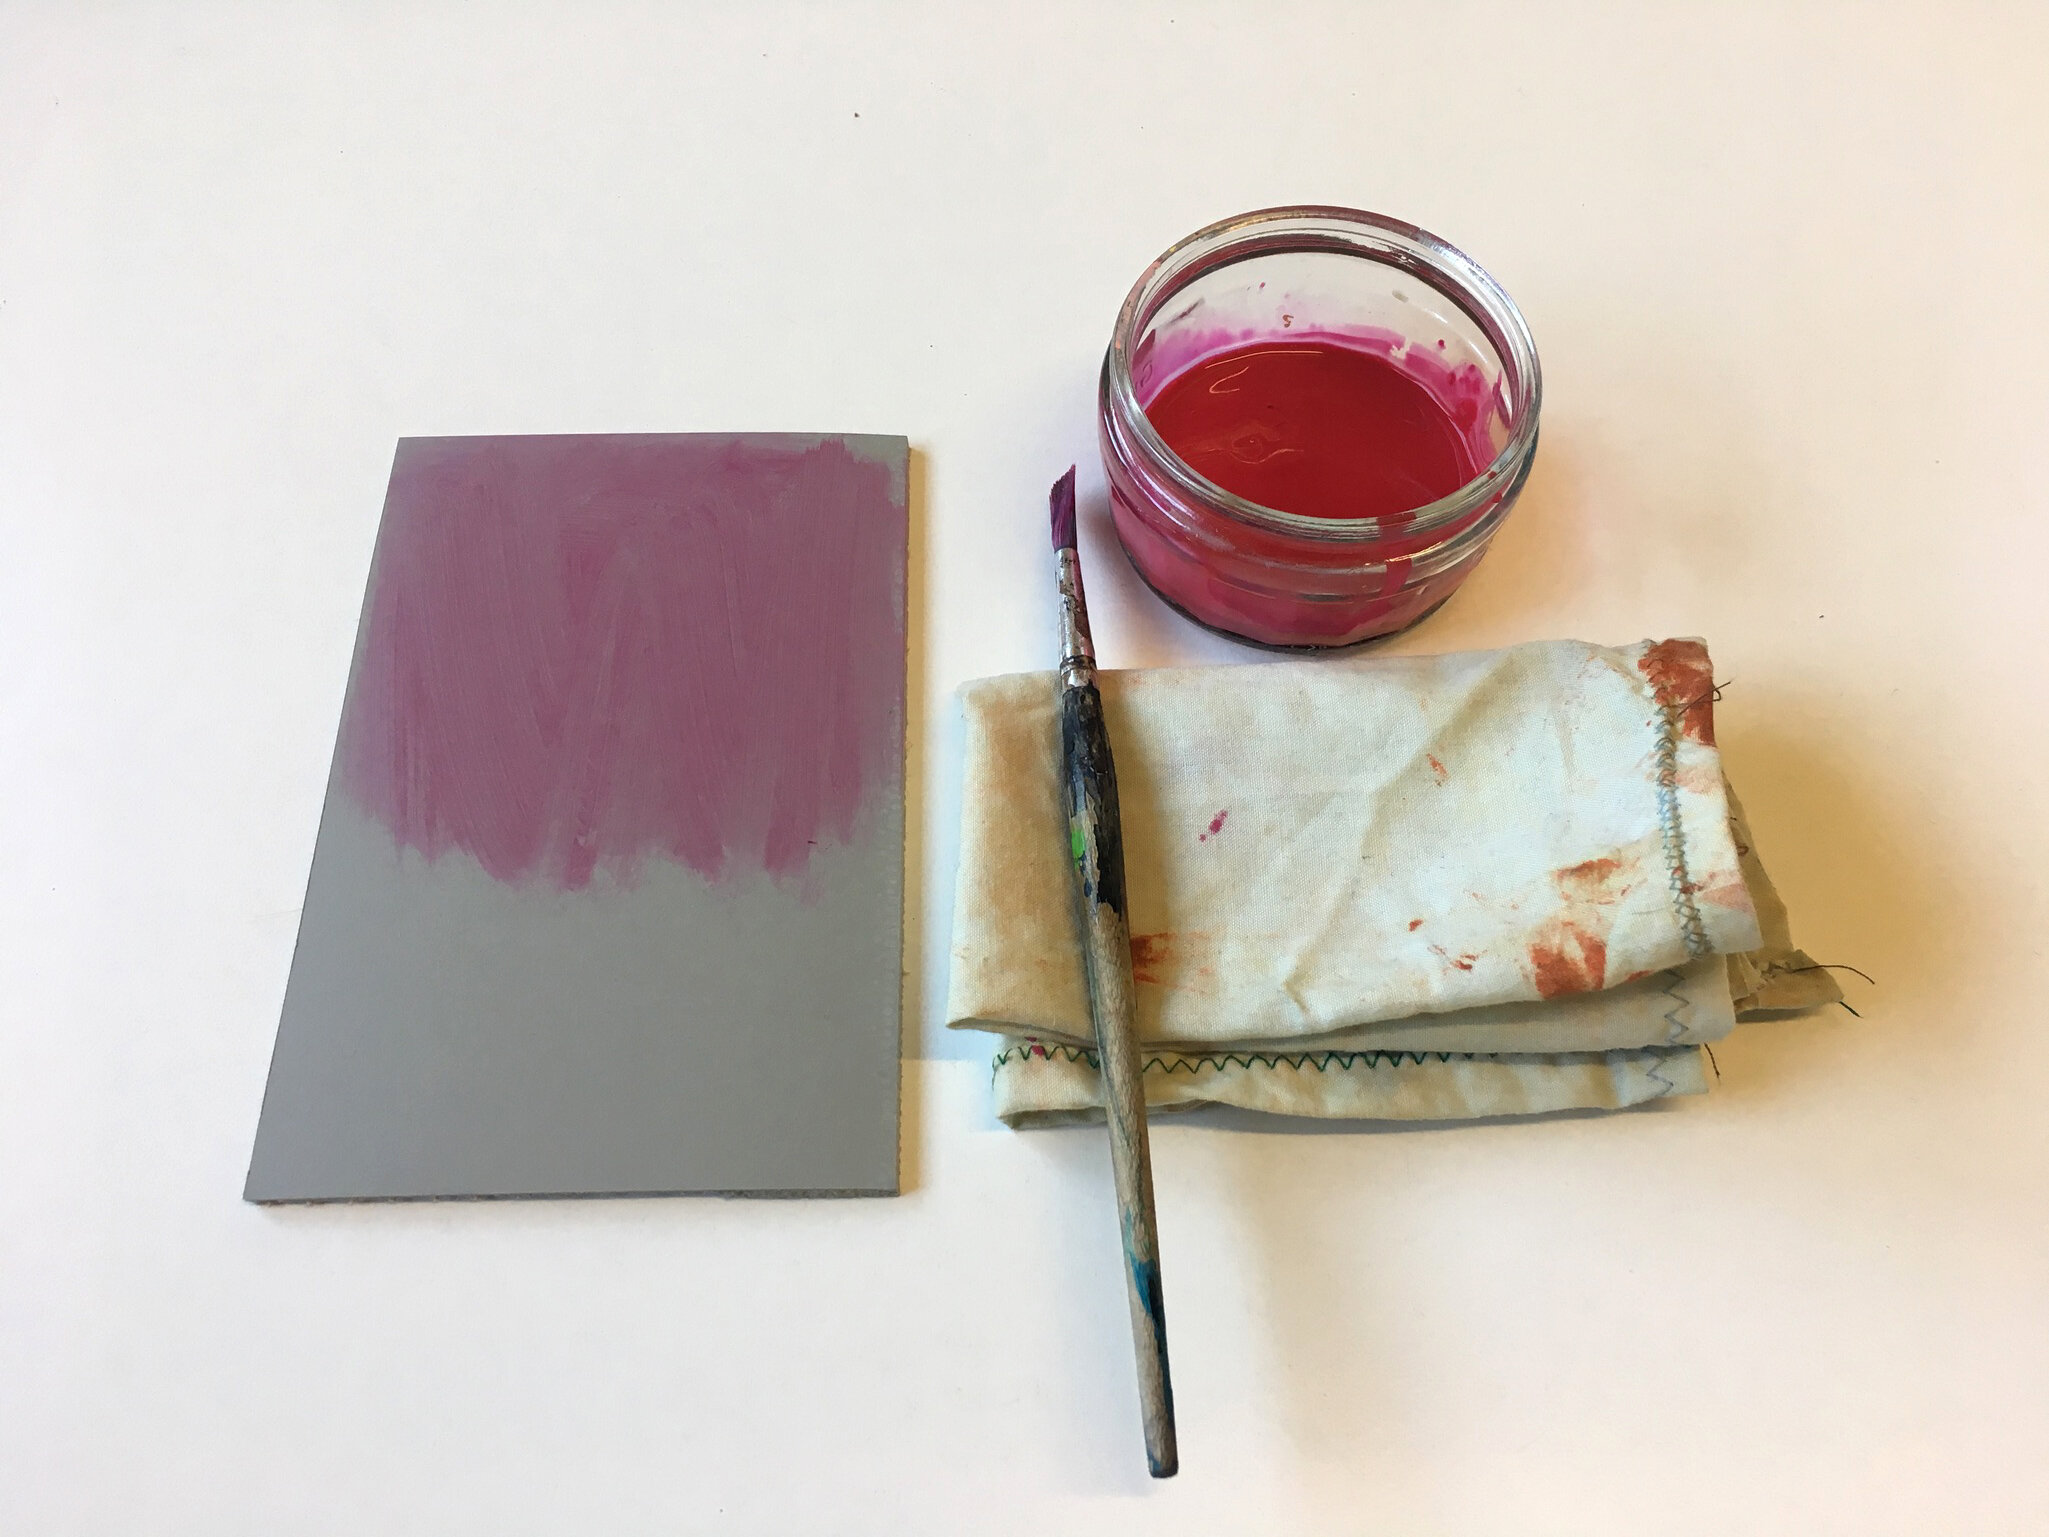
Before you start carving the Lino it can be really useful to stain it first using some watered down Acrylic paint, especially if you are using traditional grey Lino. This will make it a lot easier to see your cut marks. You don’t need much paint. Try not to leave lumpy streaks as these can show up in your prints, so rub paint well into the Lino. Remember the aim is to stain it, not paint it.
Cutting Your Lino to Size

Sometimes you need to cut your Lino to size. To do this first mark a line with a pencil to the size you want. With the Lino resting on a cutting mat, hold firmly and score a couple of times along the line using a sturdy knife and metal ruler. Pick up the Lino and fold along the scored line. Hold the Lino like a open book, with the scored line facing you, resting on the cutting mat, cut through the hessian backing.

Using the Tools
When using the tools it is important to always carve away from yourself (with the exception of the knife tool) and away from your other hand that is supporting the Lino. If you need to cut in another direction then always turn the Lino rather than carving back towards yourself.
Always use a bench block or a anti slipping mat under the Lino to prevent slipping and to reduce the risk of accidentally carving the wrong bit and/or injury to your hands. Bench blocks can be easily made from scrap bit of wood or can be bought from DIY shops or from the suppliers listed at the end. The anti slipping mat I buy from Wilkos, it's intended for car boots and kitchen drawers and is reasonably cheap to buy.
If at any point you find carving becomes difficult then warm the Lino up if using traditional Lino. You can do this this either by using a hairdryer, placing a hot water bottle on top of it, popping it onto a radiator or if it’s a small piece then sitting on it will work a treat. By warming up the linseed oil in the Lino it will make carving much easier. If it’s still difficult to carve, you’ll probably need to sharpen your tools too.
Using the V Tools
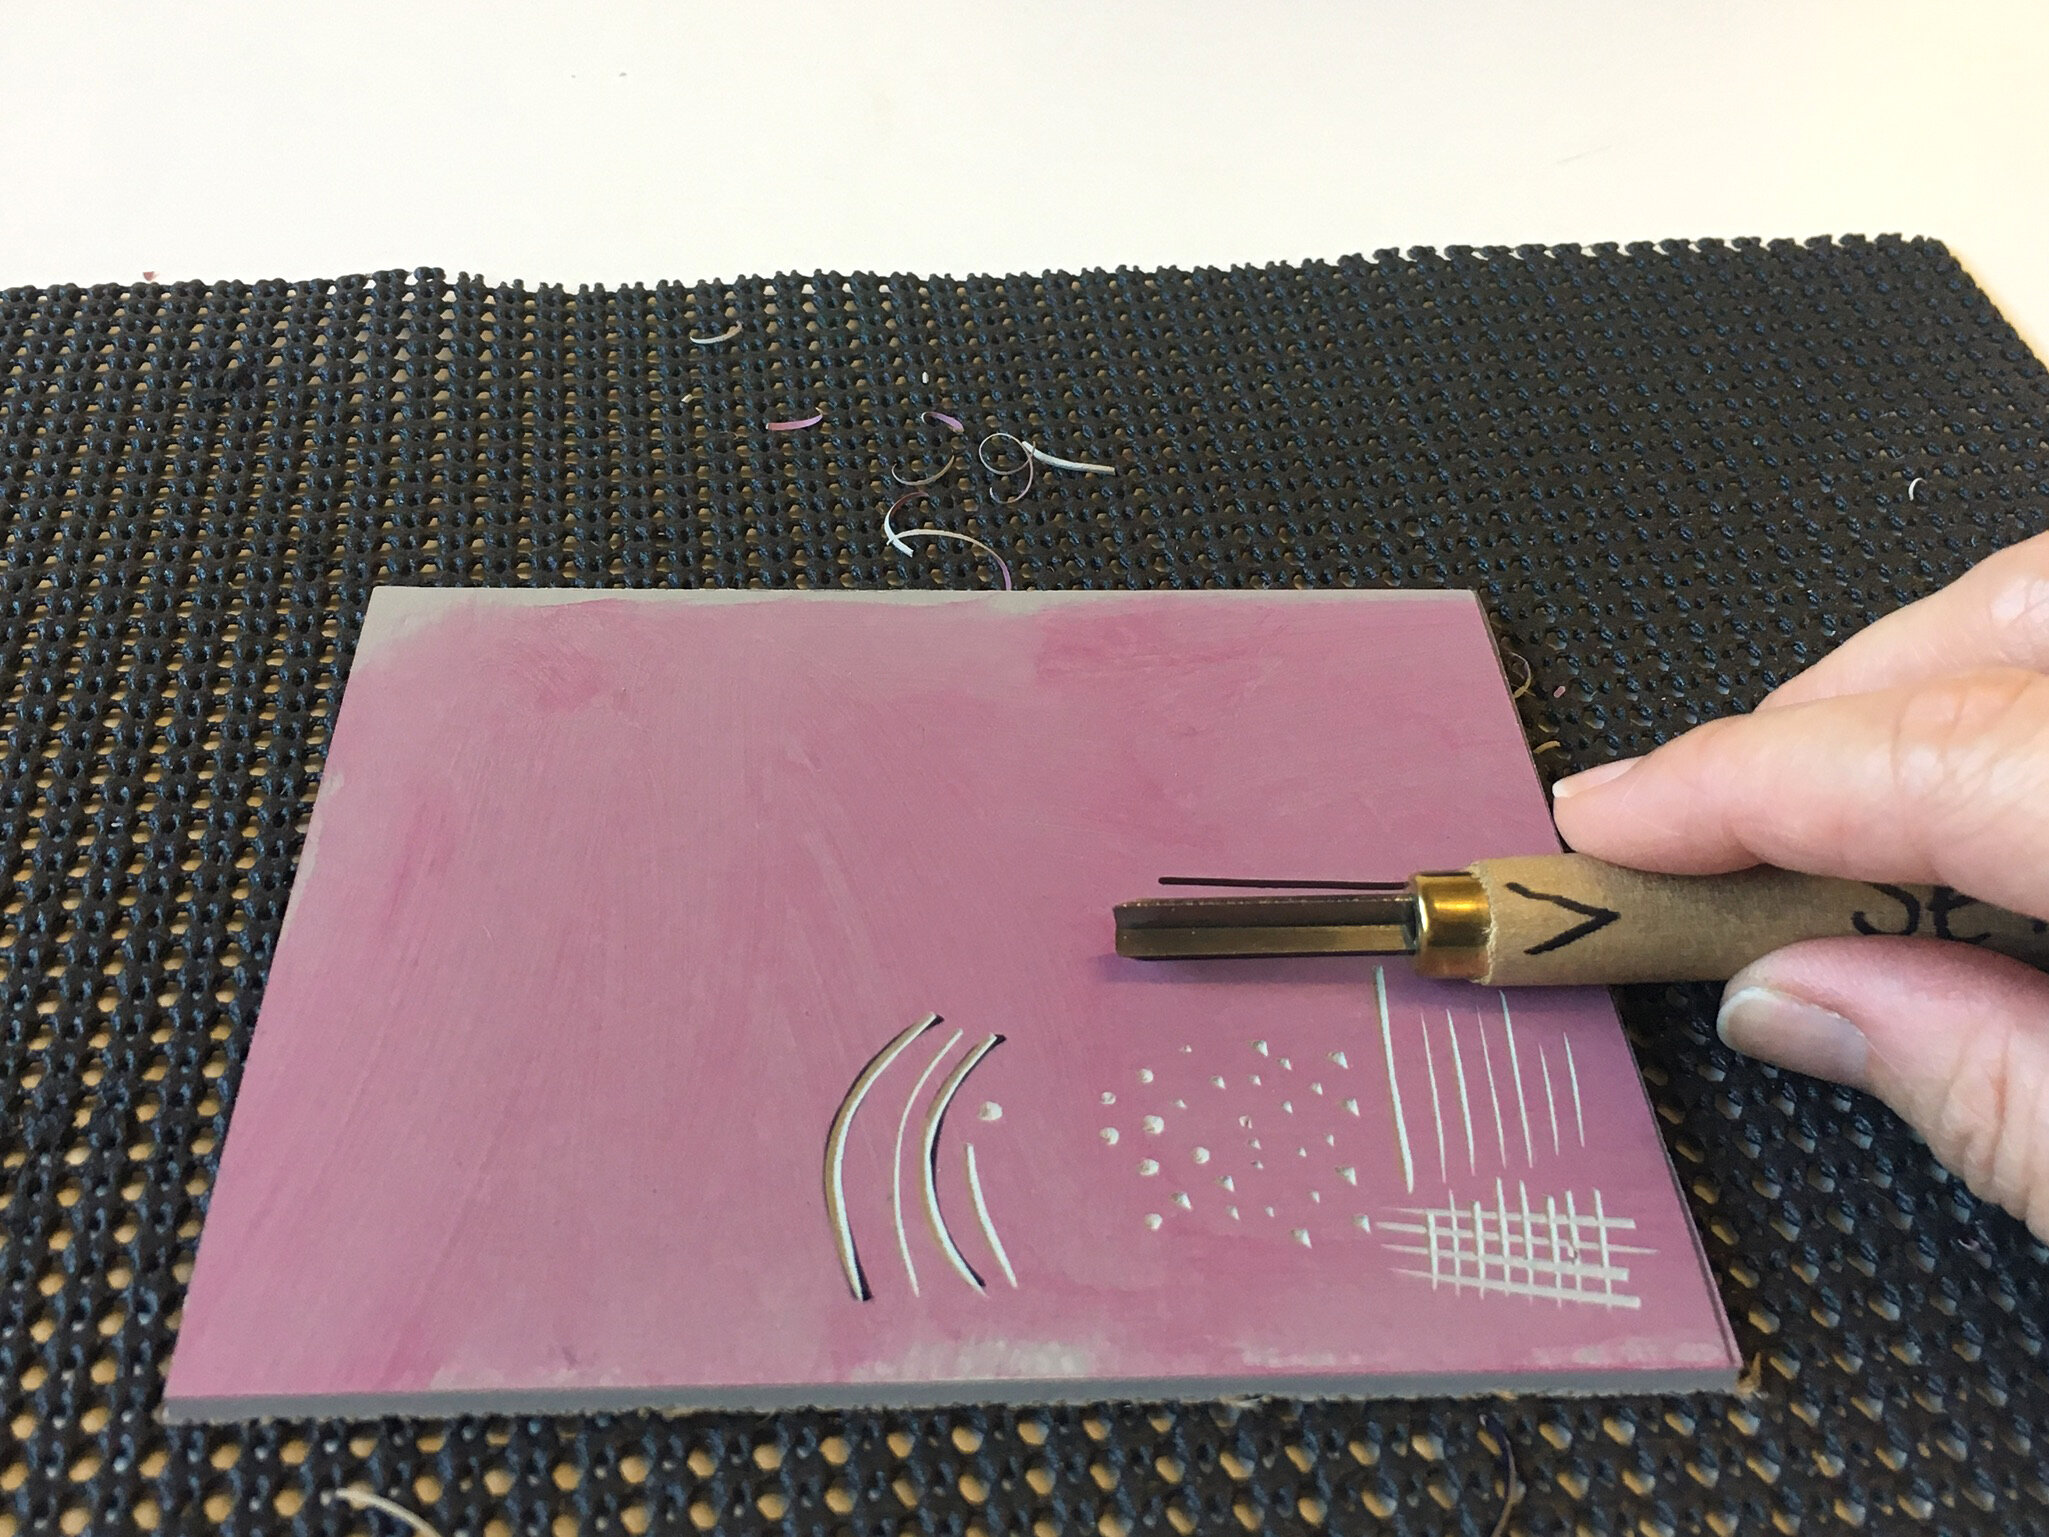
This tool is mainly used for line work. Hold the tool a bit like a pencil at a 45º angle. Hold close to the blade as this will give you more control. I sometimes use my middle finger on my other hand to support the tool while carving, just lightly resting on it rather than putting any weight on it. Always carve away from you and try and carve in small smooth movements. Smaller strokes leave less chance of error. Take your time. Don’t rush. Try not to carve too deeply. Start with shallow thin lines and go over them again if you require wider lines.
When carving curved lines, begin by cutting the line, stop but keep the tool in place, then turn your Lino and continue carving. Stop, Turn, Carve, Repeat. Eventually, with practice you’ll be confident to carve and turn the Lino together. Just remember to take your time. Rushing will only result in going off course. As a general rule don’t cut deeper than halfway into the Lino.
For more tips on using the V tool watch the video below
Using the Knife Tools

The Knife tool is also used for carving lines. Some printmakers find they have more control over the width of the lines than using the V tool. When buying tools in sets you will often find the Knife is predominantly right handed. You can buy left handed knives individually however they can be very expensive so if you don't want to invest in one just yet I will show you show how to use a right handed knife for both right and left handed people in a safe way as well as how to use a left handed knife.
Knife Tool for Right Handed Users

The knife tool is the only one that you’ll use carving towards yourself. It has a flat side and a bevelled side. You need the flat side facing your left. Hold it close to the blade, this will give you more control.
Hold the tool upright and tilt it slightly to the right. It’s easier to follow a drawn line, using just the tip of the blade, push it into the Lino at the top right of your line and carve your line down towards you. Take your time. Turn your Lino around and repeat, placing the tool to the top right of the line you’ve just carved. Providing you have the correct depth and the angle the line should lift out.
To carve out a curve, as with the V tool, try not to turn the Knife but turn the Lino to create the curve. Again it is easier to follow a drawn line. Starting at the top right of the line begin carving, stop, turn the Lino , continue carving and repeat. Stop, Turn, Carve, Repeat.
Turn your Lino around and repeat, placing the tool just to the top right of the line you’ve just made and carve the line towards you.
Soon, with practice you will be able to carve and turn the Lino at the same time. Take your time, there’s no need to rush.
Using the Knife Tool - Left Handed Using a Right Handed Knife

It is possible to use a right handed knife if you are left handed. Hold the knife with the flat edge facing your right. The bevelled edge will be on your left. You’ll be carving away from yourself so hold it close to the blade as this will give you more control. Hold the knife upright and tilt it slightly to the left.
It’s easier to follow a drawn line, and using just the tip of the blade, push it into the Lino at the bottom left of your line and carve your line upwards. Take your time. Turn your Lino around and repeat, placing the knife just to the bottom left of the line you’ve just made.
For curved lines do the same but start on the out side edge of the curve. As with the V tool, don’t turn the knife but turn the Lino to create the curve. Begin cutting, stop, turn the Lino, continue carving . Stop, Turn, Carve, Repeat.
Using the Knife Tool - Left Handed Knife

The knife tool is the only one that you’ll be use cutting towards yourself. It has a flat side and a bevelled side. You need the flat side facing your right. Hold it close to the blade, this will give you more control. Hold the tool upright and tilt it slightly to the left. It’s easier to follow a line, using just the tip of the blade, push it into the Lino at the top left of your line and cut your line down towards you. Take your time. Turn your Lino around and repeat, placing the tool to the top left of the line you’ve just cut. Providing you have the correct depth and the angle the line should come out as you cut.
Using the U Tool

The U tools are mainly used for carving away large areas of Lino. To use, hold as you would the V tool and carve away from yourself. If you need to make a curve remember to turn your Lino so you are always carving away from yourself.
For more tips on using the U tool please watch the video below.
Using the Chisel Tool

The Chisel is traditionally used in Woodcut printing. Used for creating registration corners on the printing block. This doesn’t really happen in Lino printing but many sets will still have a chisel tool in them.
So you can use the chisel for flattening off lumpy areas that are left from using the U tools to prevent them from getting ink on and printing.
Try using the U tool first by lightly going over the ridges to help flatten them.
If you find you are making things worse then use the chisel. Hold like the V and U tools, with the flat side facing up and the bevelled edge facing the Lino. Carve away the lumpy bits.
Watch The Video
The following video goes over the above information and some extra carving tips. Enjoy!
And Finally
Thank you for reading this far and learning all about which tools you use for lino printing and how to use them
Links
I use the following suppliers for all my tools and Lino.