Printmaking Tutorials: 4 Ways to Bring Tone and Texture to Your Lino Prints
What do you think of when you think of Lino Prints? You're probably thinking that they are rather flat looking in appearance and that's just what a Lino Print is and create your designs with this in mind
But what if I told you that it doesn’t have to be that way and in fact you can give the impression of light and dark, shade and textures. Are you thinking “No Way!”?
Well, I say “Yes Way!”
So let me show you 4 really easy methods that will give you more tone and texture to your Lino prints
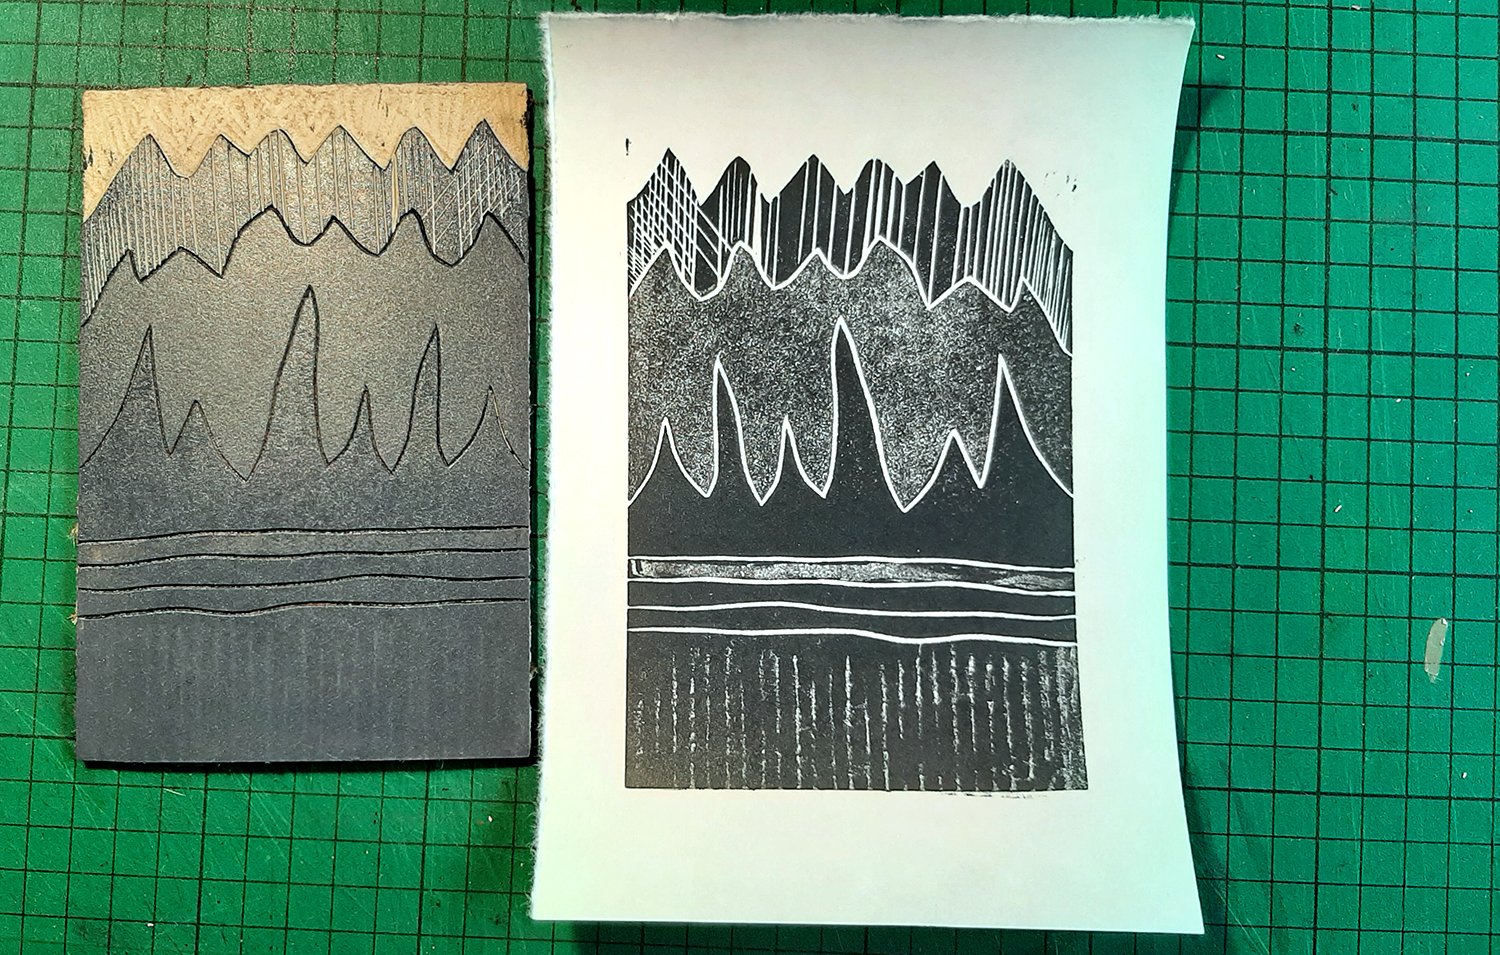
1 – Use Your Cutting Tools
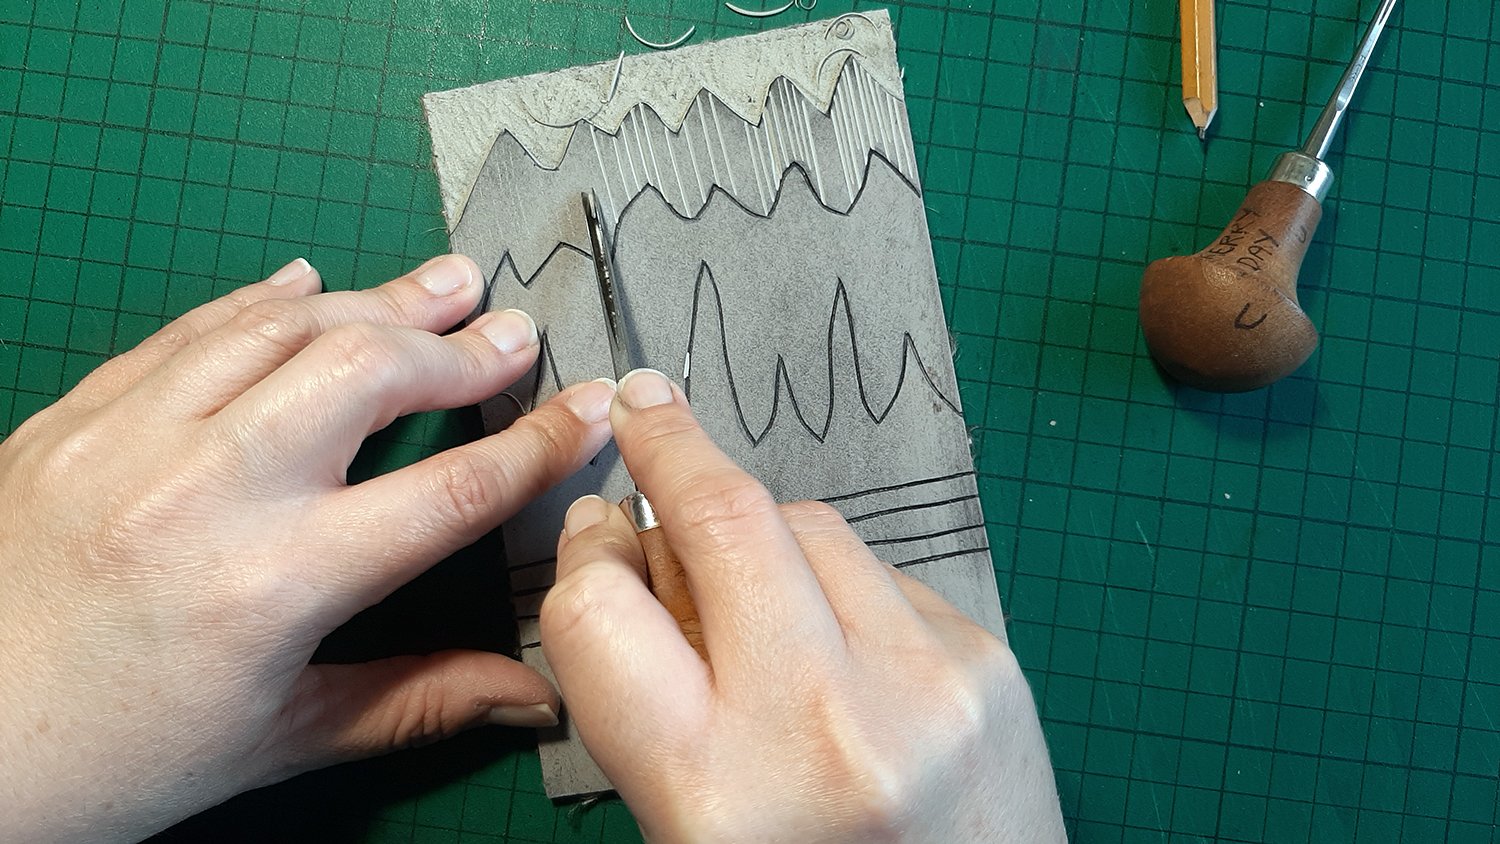
You’ll be amazed at what lovely effects that you can make just by using your Lino cutting tools. Rather than going straight in on your design get a scrap piece of Lino have a practice. Start with different cut marks, from thin to thick lines, cross hatching, cutting lines close together and further apart, dots, circles and print it and see what you get and notice how it will give you a sense of tone

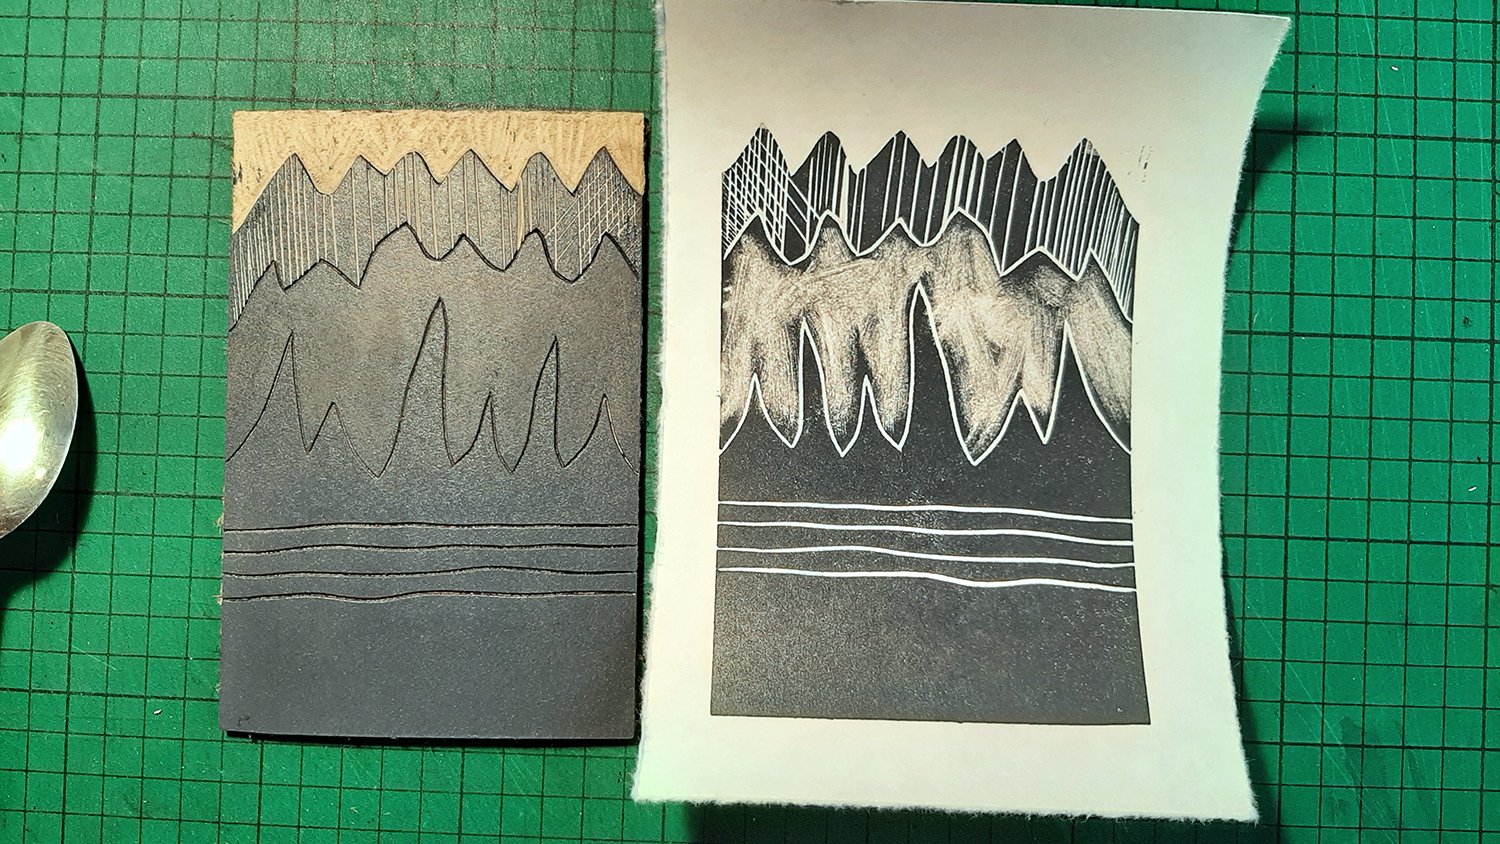
2 – Get Wiping

Another great way to achieve tone and texture to your Lino Prints is to ink up your Lino and then just wipe some of that ink away. You can create some really beautiful brushy sweeping marks this way. This method does make creating identical prints impossible but a varied edition instead. And a lovely way to bring a more painterly feel to your work
3 – Masking Off Areas with Paper Stencils

A really lovely effect to get two tones on your Lino print at once by making a stencil which will help remove a layer of ink and give a softer look to the print
Before inking your Lino, trace an area you want to print lighter and trace around it. You can just cut out the shape from tracing paper but if you would like a lighter effect then trace this on to paper and cut out. Now you have your mask

Ink up the Lino and carefully put the stencil in place
Put your printing paper on top and tape it down on one side. This will create a hinge
Print the Lino. If printing by hand pay extra attention to the stencilled areas
Lift the paper being careful not to move the Lino or to remove the tape, just lift the paper up like a door
Carefully remove the paper stencil, place the printing paper back down and continue printing
Remove the tape and lift the paper and reveal the wonderful two-toned print

4- Using Textured Stencils to Make Patterns
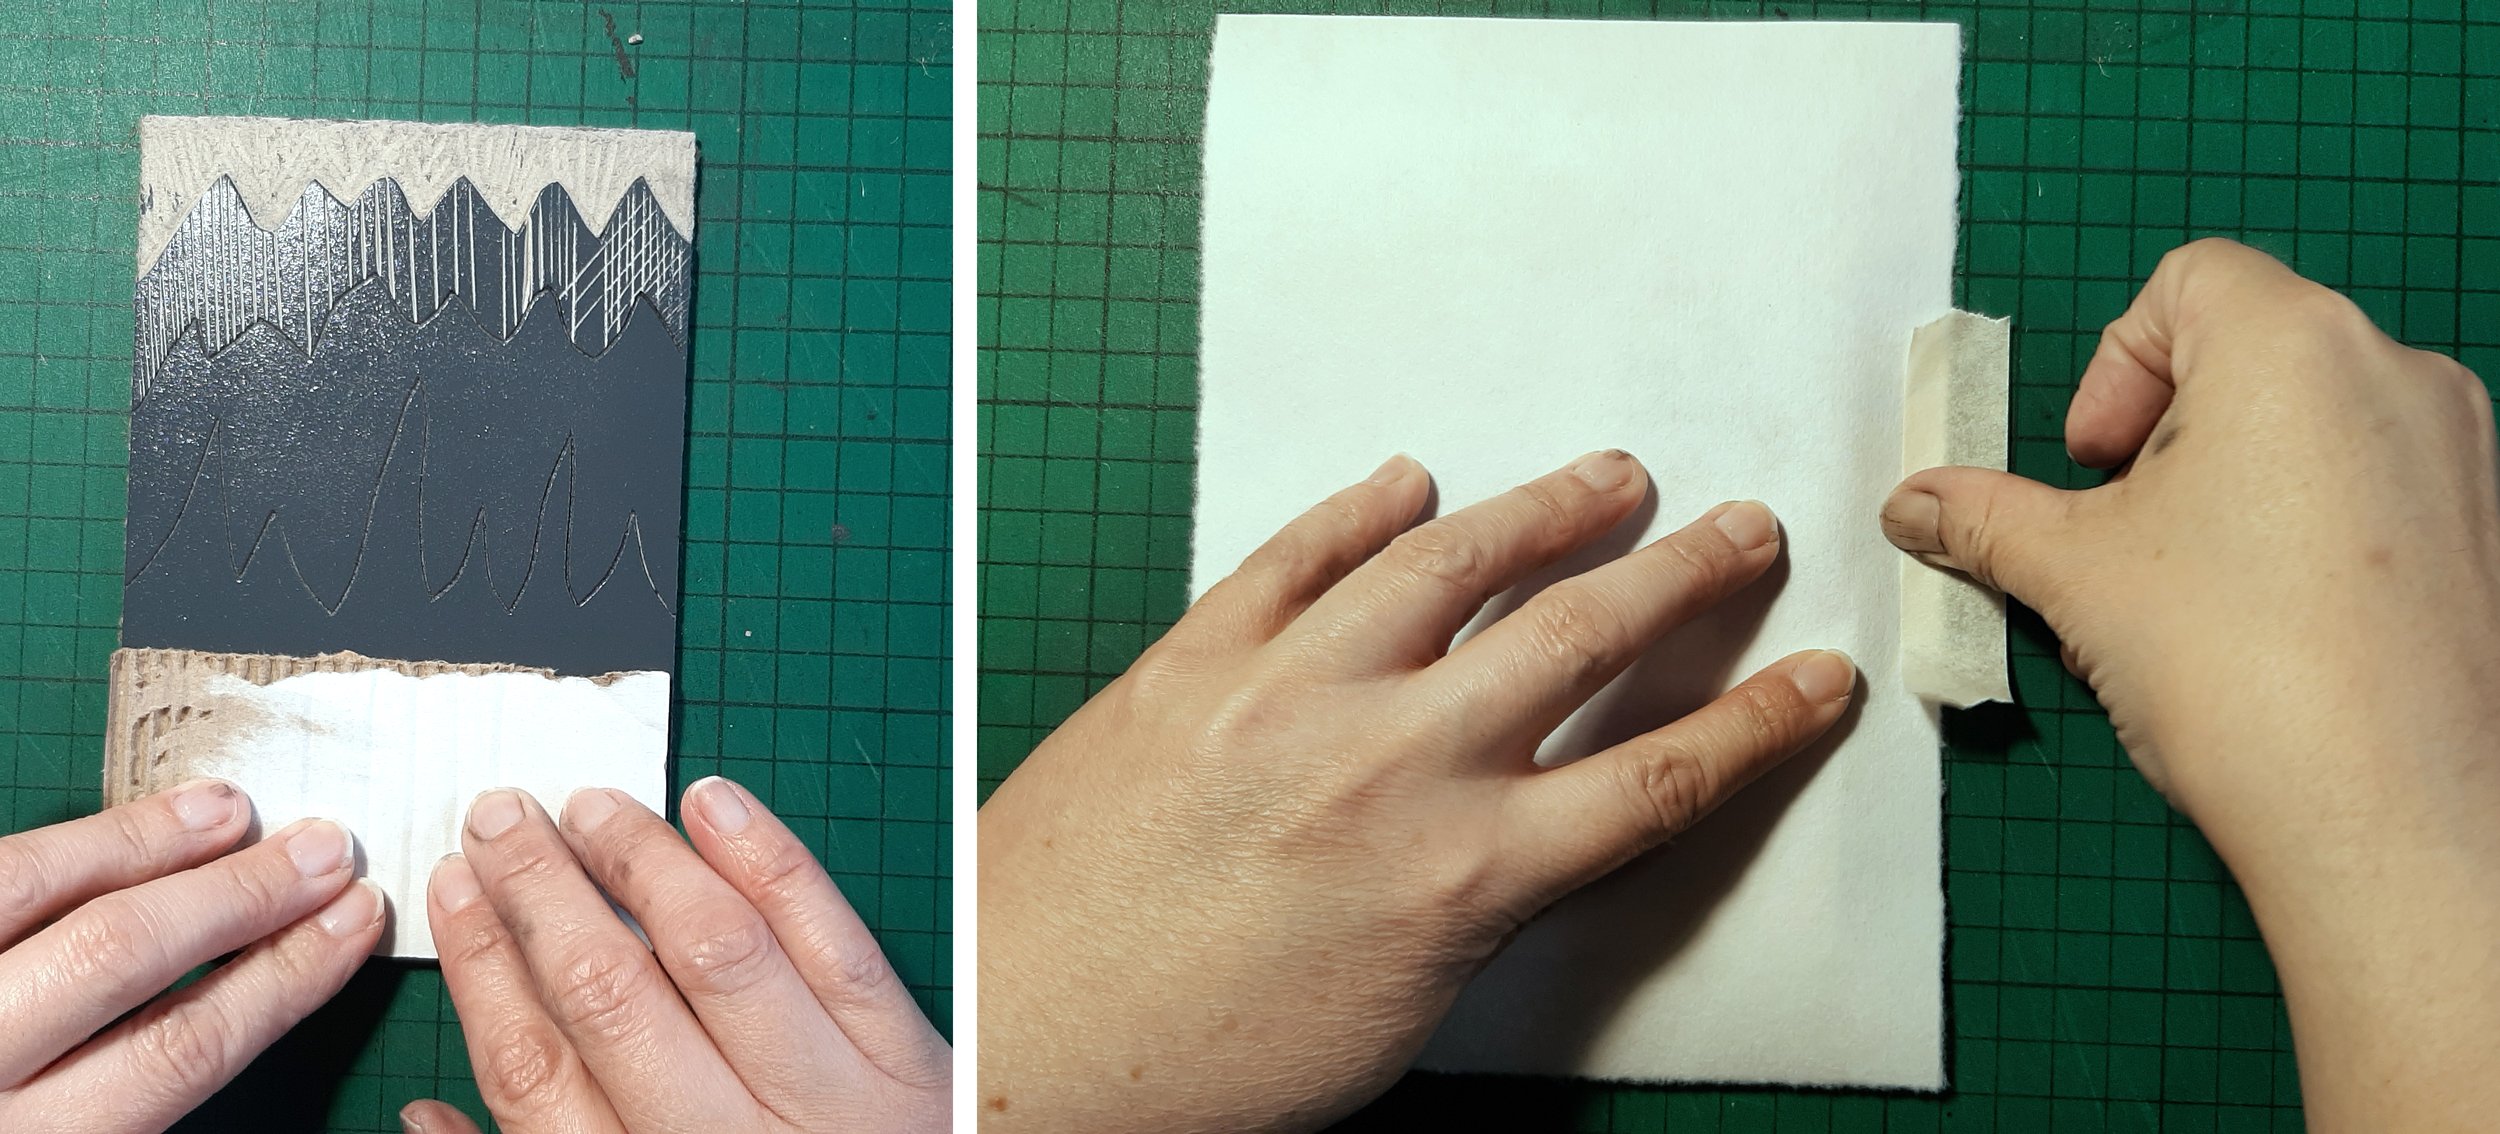
This is a great way of adding patterns to your Lino Prints without having to carve them into your design. It does work better when used with a printing press but is totally doable by hand
These are used in a similar way as the Paper Stencils. Most textures can be used as long as they are not too bulky or metal as these can rip the printing paper and or damage your printing press if using one
Get some textured materials, such as corrugated card, bubble wrap, lace or embossed wall paper
Trace the area you want to have a pattern and transfer onto your chosen texture, making sure the textured side will be facing the Lino. This is your textured stencil
Ink up your Lino and place the textured stencil on the Lino
Put your printing paper in place and tape down one side to create a hinge
Print. If printing by hand pay extra attention to the stencilled areas
Lift the paper, and gently remove the textured stencils and place the paper back down and continue to print
Once done, remove the tape and lift your paper to reveal all the lovely patterns

I hope you have enjoyed reading and finding out about my 4 ways to bring tone and texture to your Lino prints. Why not have a go yourselves. Have fun with it, use them on their own or try using all the techniques all together on one Lino design
Scroll on and watch the 4 ways to bring tone and texture to your Lino prints